System Update
Clearing Browser Cache
After upgrading IP Fabric to a newer version, you should see the Your
application has been updated and must be refreshed dialog in the main GUI.
It is usually sufficient to just click the Refresh button.
However, in case of issues with the main GUI or if you did not see the mentioned dialog, please force refresh your browser cache.
The key combination for doing this depends on your operating system. In your browser window with your IP Fabric appliance’s URL open, use one of the following key combinations:
- Windows:
Ctrl+F5 - macOS:
Command+Shift+R - Linux:
Ctrl+F5
This will only affect the browser cache for the IP Fabric appliance.
Back Up System Before Update
The best practice is to save the virtual machine’s state (VM snapshot) using your hypervisor. Alternatively, you may use an IP Fabric backup. To proceed with IP Fabric backup, follow these steps:
- In the top-right corner of the main GUI, click Support.
- Click System Administration to access the interface on port
8443(e.g.,https://ipfabric-ip-or-fqdn:8443). - Log in with the
osadminuser and the password configured during the first boot. - Backup the VM by following the instructions on the Restore or Backup page.
Backup Disk
The local backup disk is not present by default! To enable local backups, please add a new virtual disk to your VM. (See Local Backup Disk.)
Update
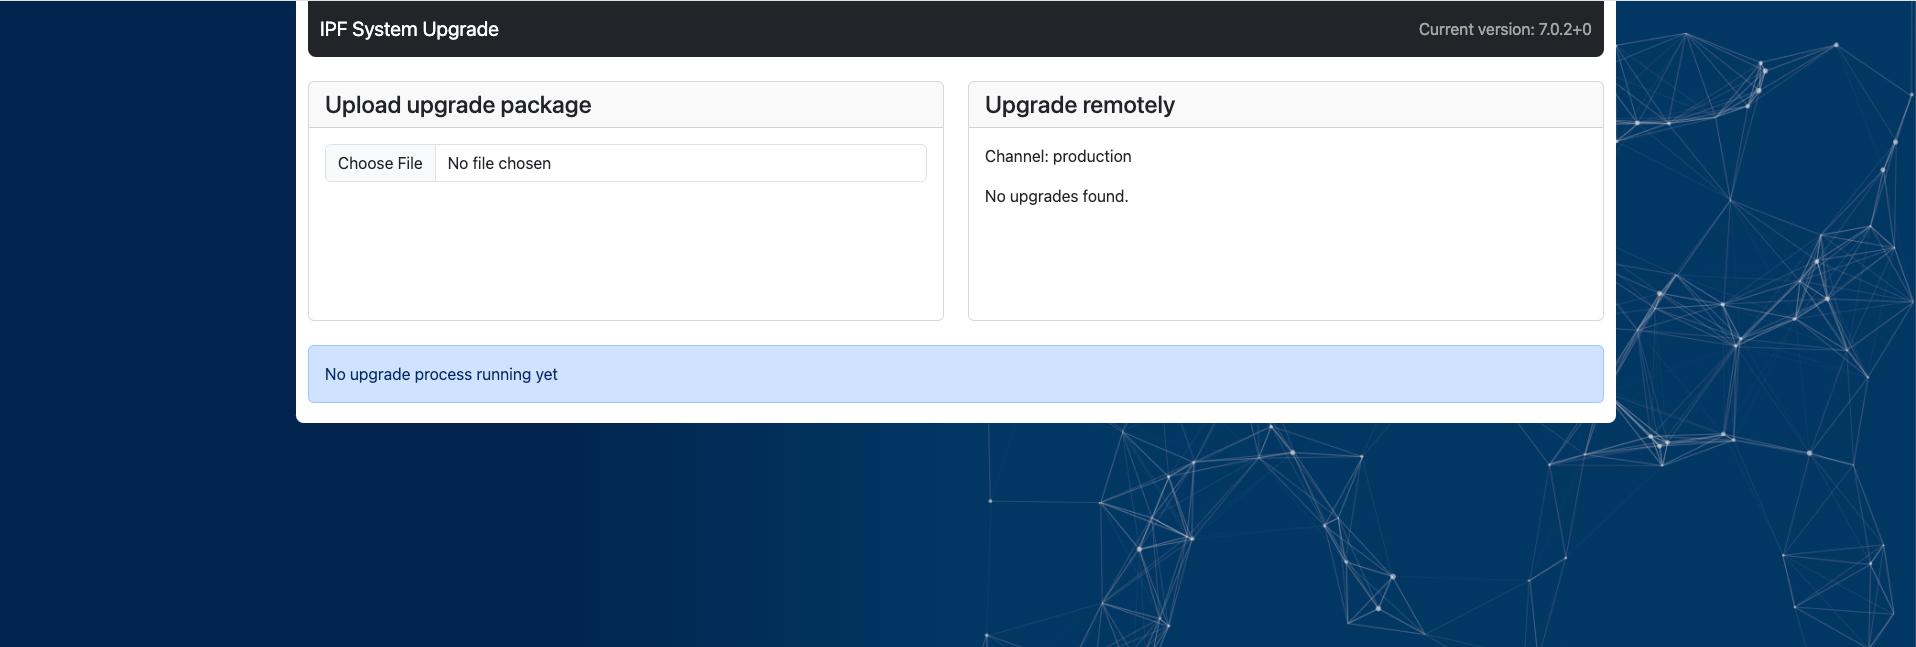
The system update functionality has been moved to a separate service, accessible
at https://ipfabric-ip-or-fqdn/ipf-system-upgrade/.
Online Update
Online updates are automatically available only when the IP Fabric appliance has connectivity to the following servers:
callhome.ipfabric.ioremote port443/tcpfor update availability checkreleases.ipfabric.ioremote port443/tcpfor update package download
Allowlisting FQDNs
In your firewall, please allowlist FQDNs instead of IP addresses, as IP addresses are subject to change.
When a new IP Fabric version is available, a green indicator will appear in the top-right corner of the main GUI.
To proceed with an online update, follow these steps:
- Go to
https://ipfabric-ip-address/ipf-system-upgrade/and log in with theosadminuser and the password configured during the first boot. - In the Upgrade remotely section, select the IP Fabric version to which you want to upgrade your instance.
- IP Fabric will automatically download the update file, perform the update, and reboot itself.
- It is recommended to create a new discovery snapshot on the latest version afterwards.
Proxy Server Settings
If the proxy server wasn’t configured through ipf-cli-config, please don’t
forget to add the following line to the /etc/environment file:
no_proxy="localhost,127.0.0.1,127.0.1.1,::1"
This is usually a cause of failed upgrade process as wget and curl commands are
used in the backround to check connectivity with IP Fabric API and they attempt to
reach localhost through the proxy server.
Offline Update
If your IP Fabric instance does not have direct internet connectivity, you may use offline update:
- Download the latest update file from https://releases.ipfabric.io/updates/.
- Go to
https://ipfabric-ip-address/ipf-system-upgrade/and log in with theosadminuser and the password configured during the first boot. - In the Upload upgrade package section, choose the update file from your computer.
- After a successful upload, the update process will start automatically, and the IP Fabric VM will reboot once completed.
- It is recommended to create a new discovery snapshot on the latest version
Proxy Server Settings
If the proxy server wasn’t configured through ipf-cli-config, please don’t
forget to add the following line to the /etc/environment file:
no_proxy="localhost,127.0.0.1,127.0.1.1,::1"
This is usually a cause of failed upgrade process as wget and curl commands are
used in the backround to check connectivity with IP Fabric API and they attempt to
reach localhost through the proxy server.
