Adding AAA User To Cisco ACS
In this chapter we will go through basic Cisco ACS configuration. We will describe how you can create network device groups, users that will be able to access the devices in these groups, and the authorization policies that will determine the rights the users will be granted on these devices.
Here is a brief description of some of the components in ACS:
- Network device groups – groups of network devices, usually with similar functions.
- Identity groups – groups of users.
- User accounts – user accounts will be placed in the Identity groups.
- Authorization profiles – profiles that control what rights are permitted. They are associated with a Network device group and an Identity group.
In our example, we will create the following:
- a single device group named RoutersHQ for the routers.
- a single router that will be placed in the RoutersHQ device group.
- two Identity groups – Admin and HelpDesk
- two users – an administrator that will be placed in the Admin group, and a user that will be placed in the HelpDesk group.
- two authorization policies – the AdminRole group with the full privilege level 15 access, and the HelpDeskRole with the privilege level 1 access to the devices in the RoutersHQ device group.
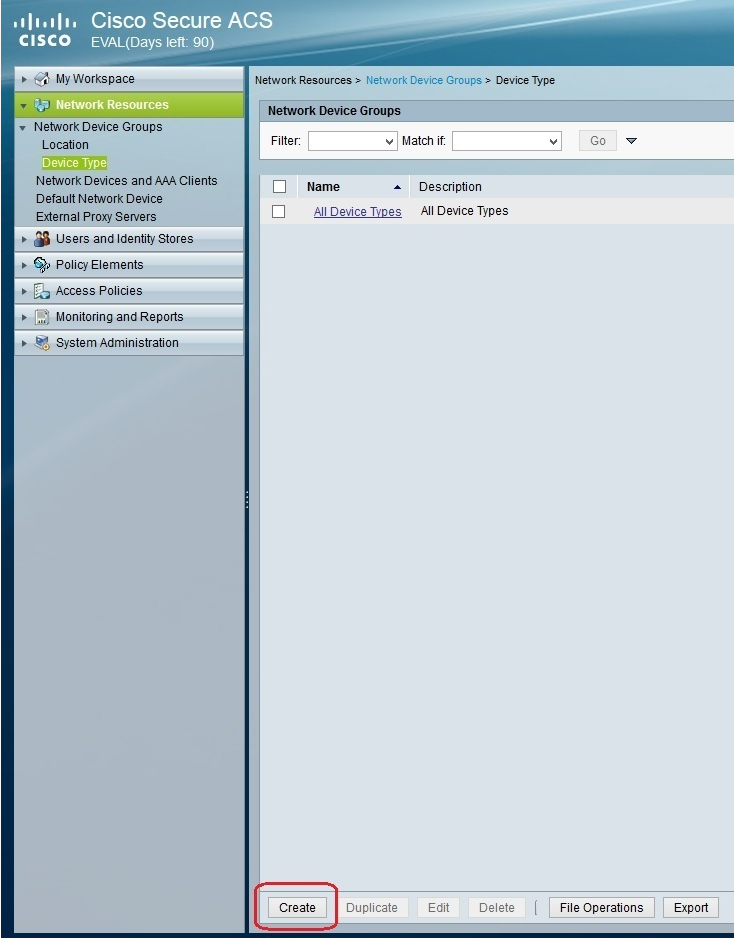
We can create the ACS components listed above. First, we need to create a device group called RoutersHQ. To do so, go to Network Resources > Network Device Groups > Device Type > Create:
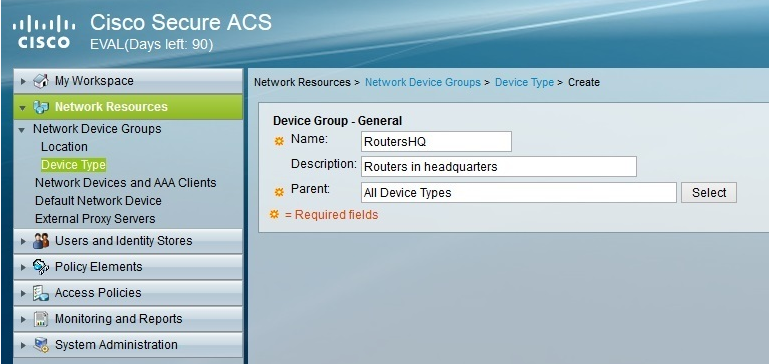
Enter the device group information and click the Submit button:
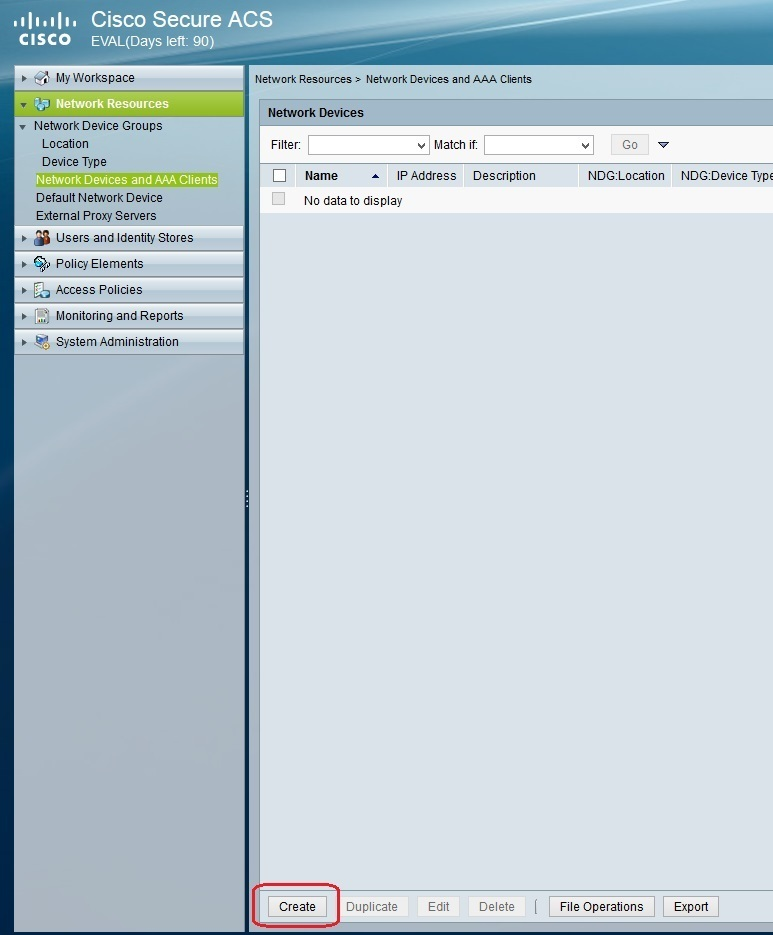
After the device group has been created, we need to add a router in it. To do this, go to Network Resources > Network Devices and AAA Clients > Create:
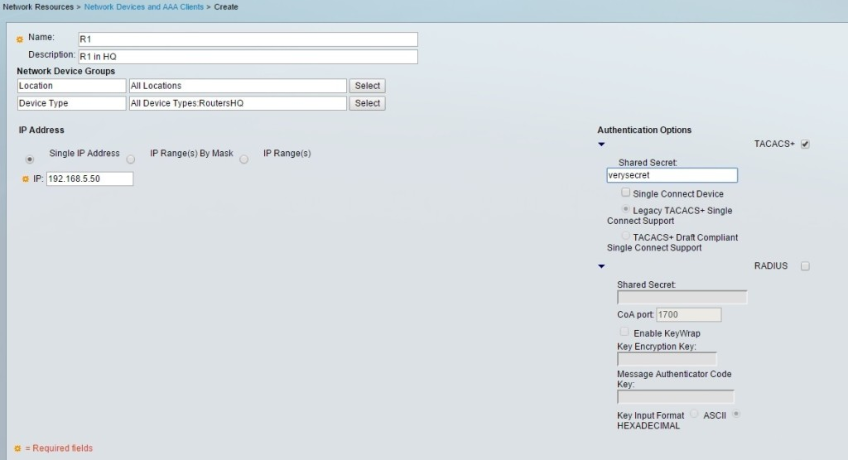
Under Name, enter the name for the router (it does not have to match the real router’s hostname). Under Device Type, select the device group you’ve created in the previous step. Under IP address, enter the IP address of the router. Under Authentication options, click the checkbox next to the protocol that will be used and type the password.
Next, we need to create two user groups: Admin and HelpDesk. To do this, go to Users and Identity Stores > Identity Groups > Create:
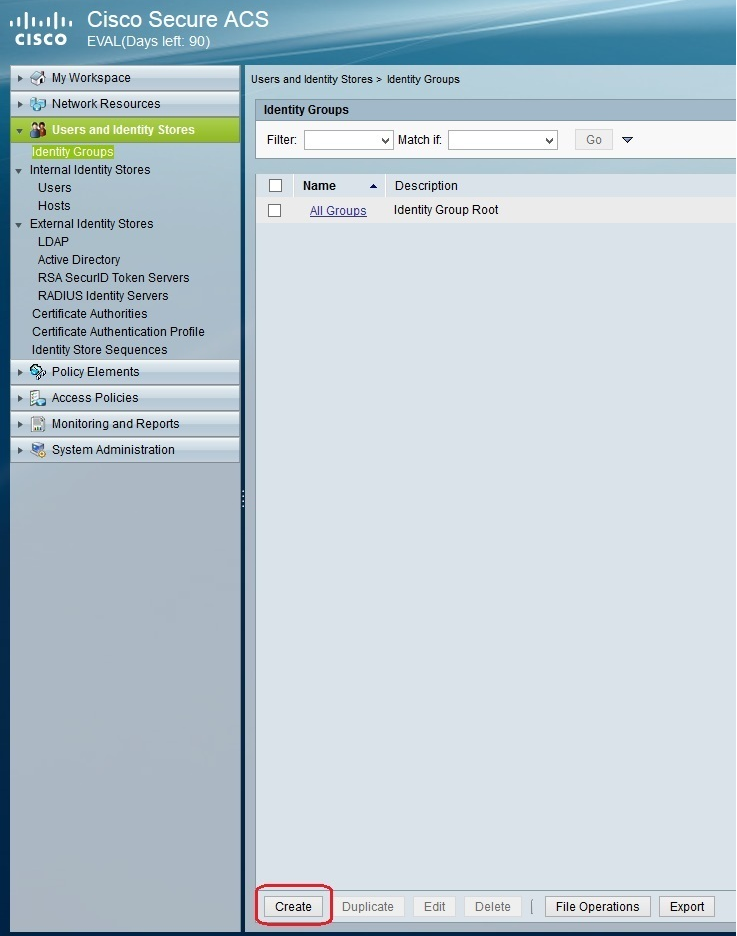
Enter the group information:
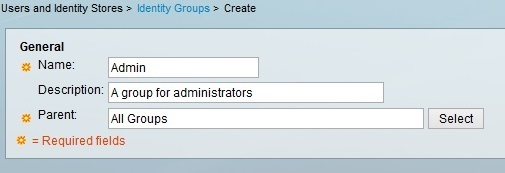
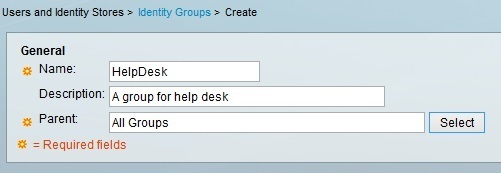
Repeat the process to create the second group:
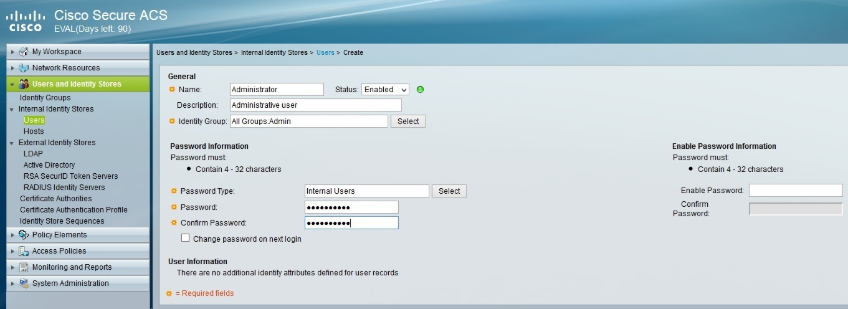
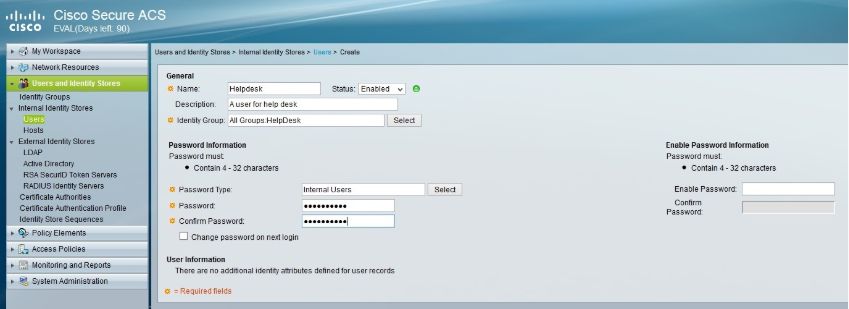
Now we need to create two users and place them in the appropriate identity groups. To do that, go to Users and Identity Stores > Internal Identity Stores > Users > Create:

Under Name, enter Administrator. Under Identity Group, select the Admin group. Under Password, configure the password for the user. When you are done, click Submit to create the user:
Repeat the process for the Helpdesk user. Make sure to select the HelpDesk group:
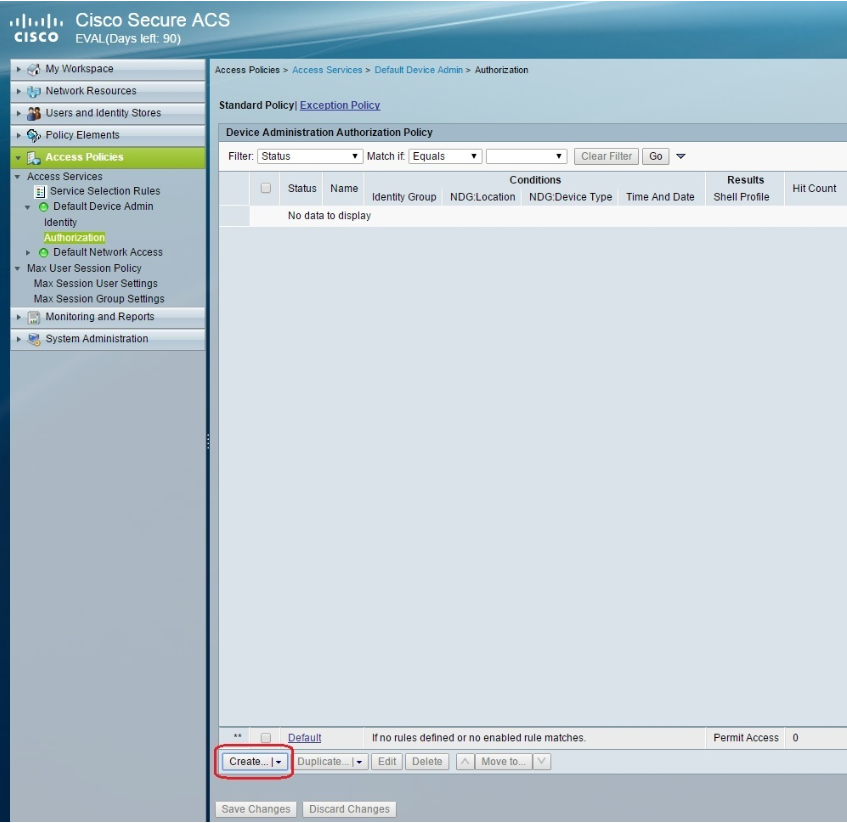
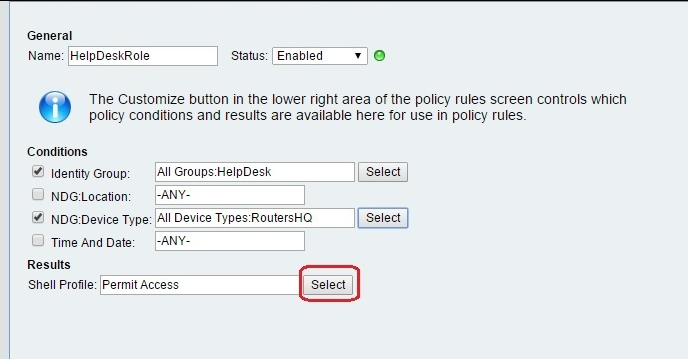
The next step is to create authorization policies to give full access to users in the Admin group and limited access to users in the HelpDesk group. Go to Access Policies > Access Services > Default Device Admin > Authorization > Create:
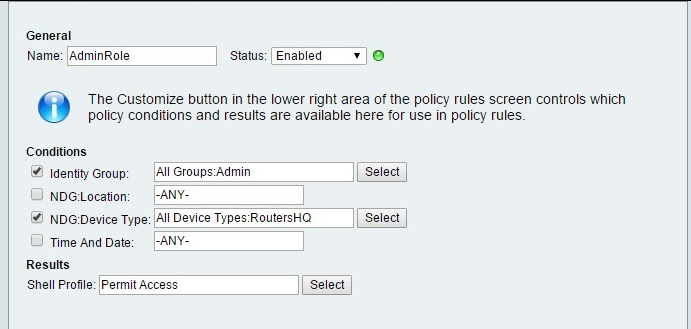
Name this policy AdminRole. Under Identity Group, choose the Admin group. Under NDG:Device Type, choose theRoutersHQ device group. Click the Select button next to Shell Profile:
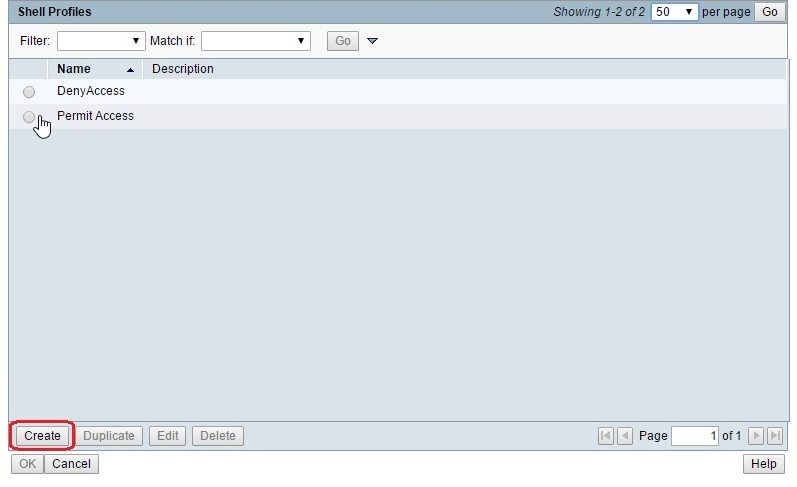
We will not use the preconfigured profiles – we will create our own. Click Create:
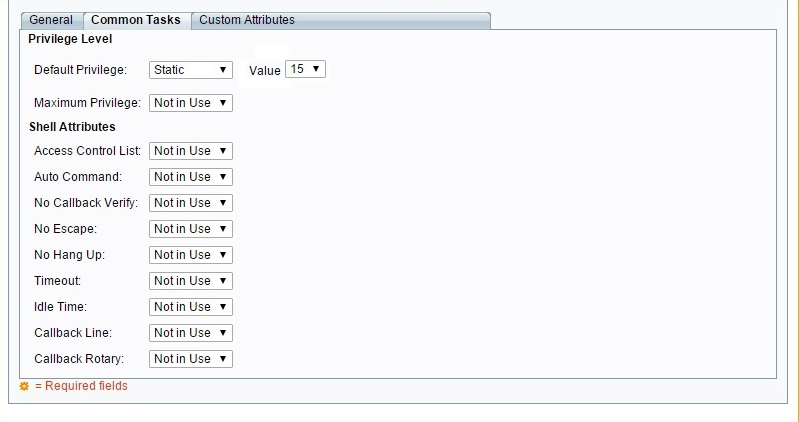
Name the profile and click the Common Tasks tab:

Change the Default privilege level to Static, and assign the privilege level of 15:
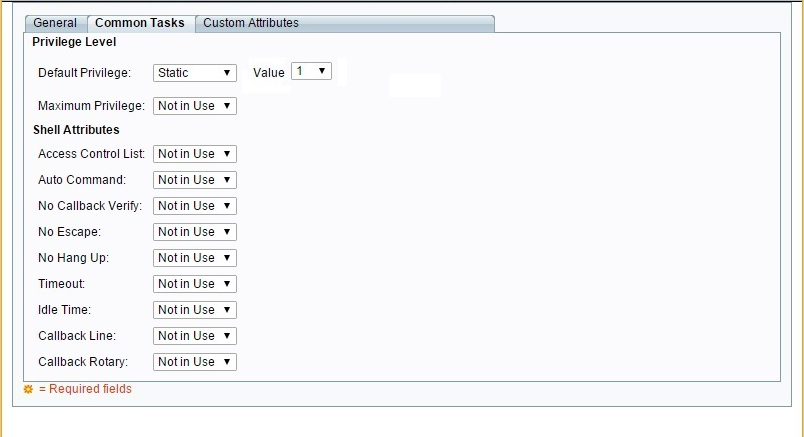
Click Submit. We need to repeat the process to create the HelpDeskRole:

This time, assign the privilege level of 1:
You can now test the user and then add it to IP Fabric authentication list.