Deploying the IP Fabric Virtual Machine (VM)
All virtual appliance images are available at https://releases.ipfabric.io/ipfabric/#current. Access is restricted to registered customers only. Please contact our sales representative if you are interested in a trial of IP Fabric.
Important
Please bear in mind that IP Fabric uses CLI access (SSH or telnet) to connect to devices for data collection. It’s important to place the VM in the proper network segment to prevent high ACL or firewall configuration overhead.
Deploying on VMware OVA Virtual Machine
- Deploy OVA to your vSphere environment as described at Deploy an OVF or OVA Template.
- Edit VM settings and adjust according to your network size as described in the operational requirements section.
- Change CPU count.
- Change memory size.
- Add a new empty virtual disk or resize the main system disk
- Power on VM and complete Boot Wizard.
Invalid OVF checksum algorithm: SHA256
Importing OVA on older vSphere/ESXi hosts may error stating the OVF checksum is invalid. Please see this documentation on how to resolve this.
Deploying on Hyper-V Virtual Machine
The QCOW2 disk image file can be converted to different formats.
Using this method we will create a VHDX usable on Microsoft Hyper-V and manually create a new VM.
- Download
ipfabric-*.qcow2from the official source. - Convert
QCOW2image toVHDX(Be sure to change the filenames in the command examples below.)- Windows instructions:
- Download qemu-img-windows
- Unzip
qemu-img-windows - Run
qemu-img.exe convert ipfabric-<*>.qcow2 -O vhdx -o subformat=dynamic ipfabric-<*>.vhdx
- Linux instructions:
- Install qemu-utils
sudo apt install qemu-utils - Convert file:
qemu-img convert -f qcow2 -o subformat=dynamic -O vhdx ipfabric-<*>.qcow2 ipfabric-<*>.vhdx
- Install qemu-utils
- Windows instructions:
-
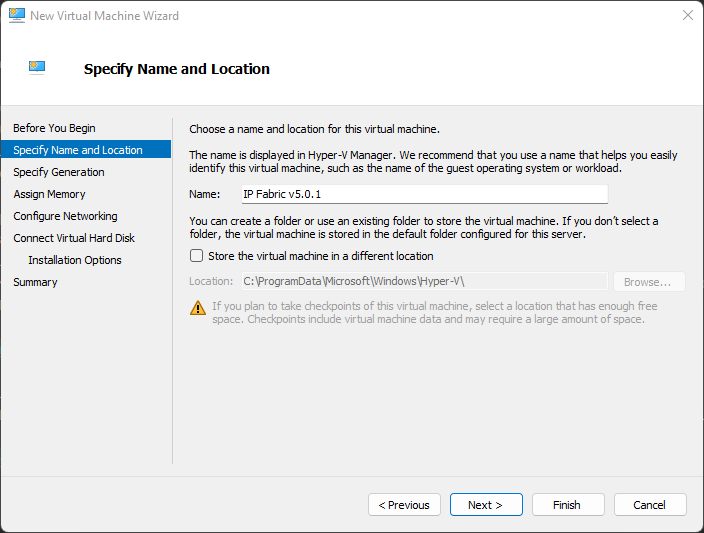
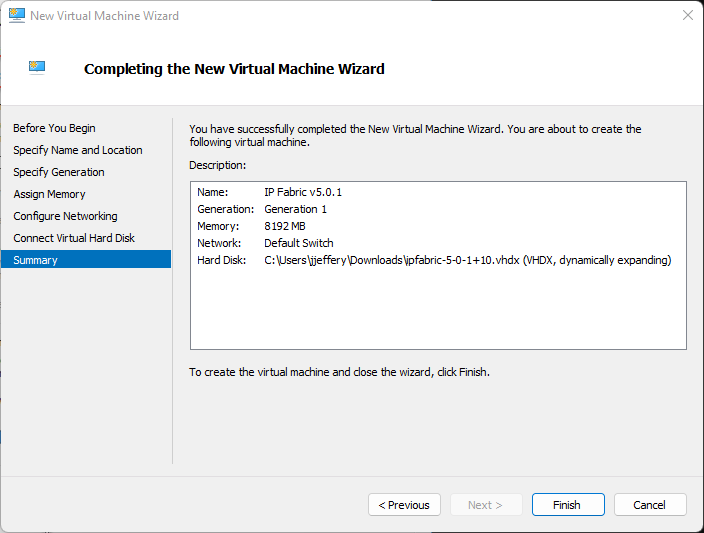
Create New Hyper-V Virtual Machine and Specify Name and Location
-
Specify Generation as
Generation 1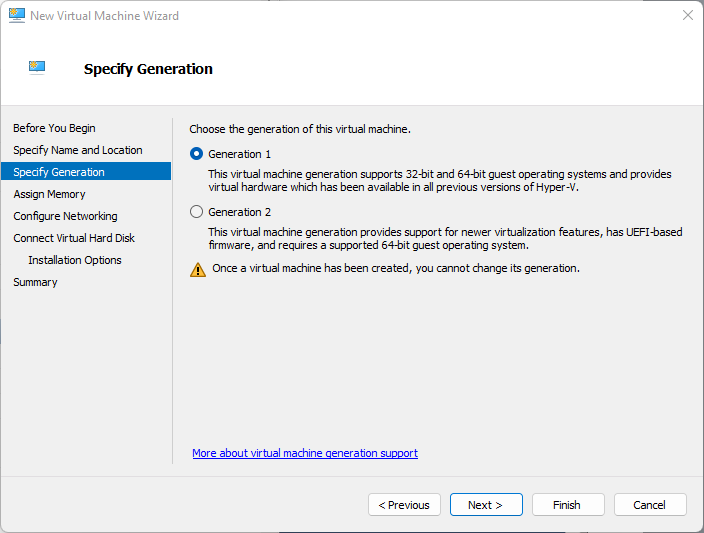
-
Assign Memory (check requirements in operational requirements section)

-
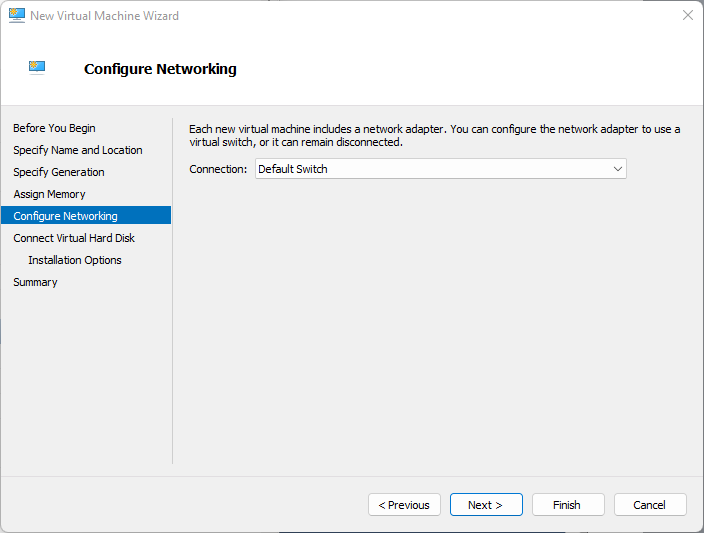
Configure Networking
-
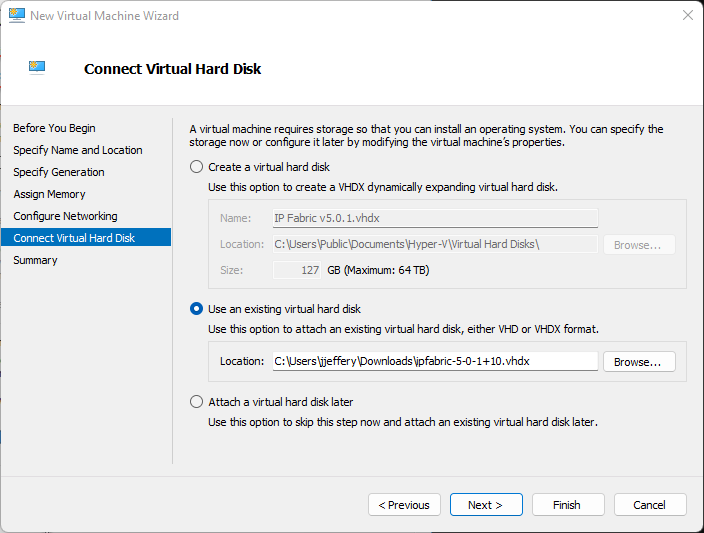
Connect the Virtual Hard Disk
-
Verify the Summary and Finish
-
Wait for the VM to be created
-
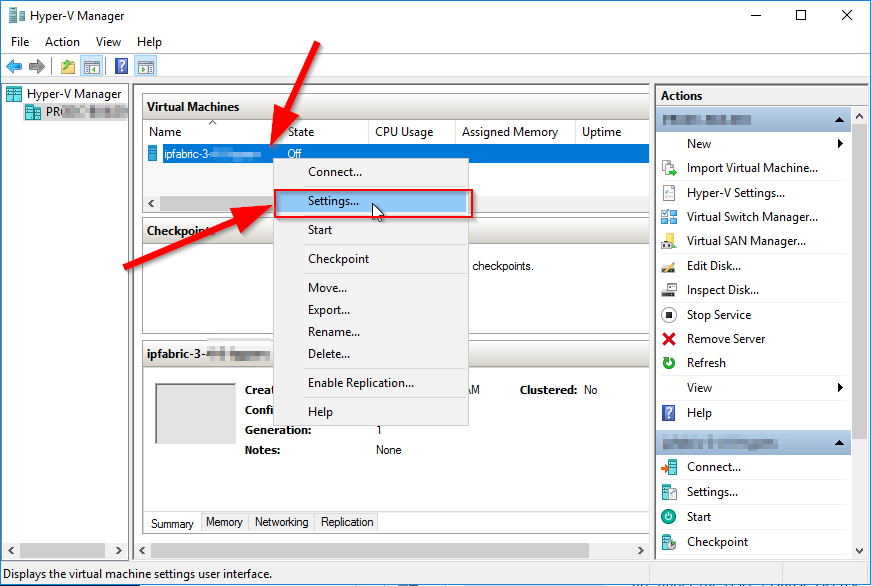
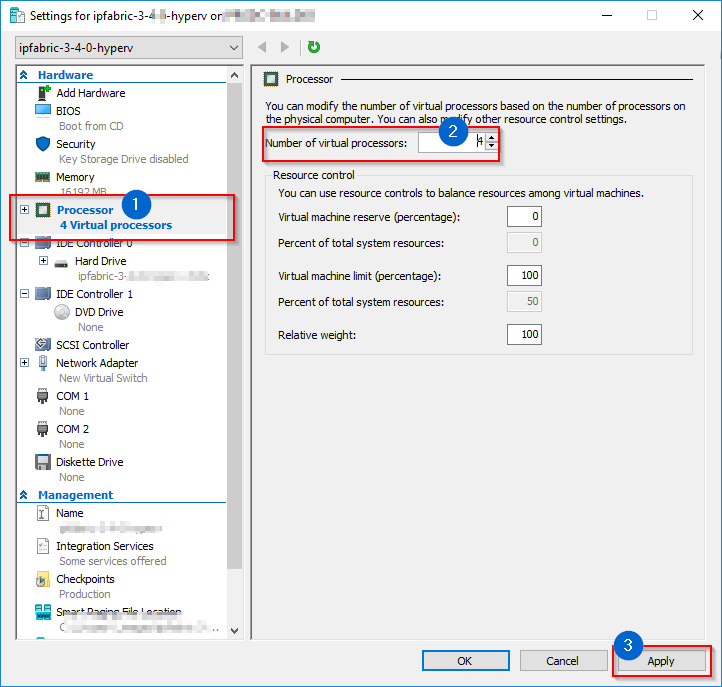
Edit the VM CPU settings (check requirements in operational requirements section)
-
Optionally increase Hard Disk Size based on operational requirements section 1. Extend the system disk or add a new empty virtual disk if necessary.
-
Close the VM Settings window
-
Start the VM.
Deploying a Virtual Machine to Nutanix
Note
The Nutanix image is based on Virtual Disks of VMware vSphere OVA image. As Nutanix officially supports import of VMware VM’s, below instructions are based on the same image as used at VMware deployment section.
- Download the
ipfabric-*-.OVAfile from official source. -
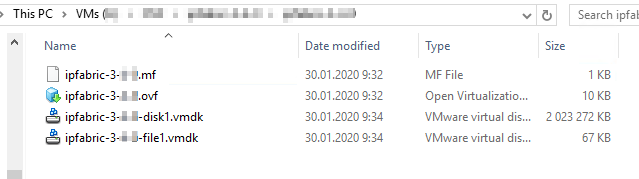
Extract the previously downloaded OVA file using 7-zip or any similar software. The structure of extracted files should look like below
-
Import
.vmdkfiles to Nutanix hypervisor and follow Nutanix’ official documentation – Nutanix import OVA and Quick tip how to deploy a VM from OVF to AHV. -
Edit VM hardware settings and adjust according to the network environment size (check requirements in operational requirements section).
- Change CPU count
- Change memory size
- Extend the system disk or add a new empty virtual disk if necessary.
-
Start the VM and check if the system starts without any interrupts.
Deploying a Virtual Machine on KVM
We have currently the limitation that drives need to be /dev/sdx. Usually Linux hypervisors are using the virtio-blk driver which is represented as /dev/vdx in the guest system. To overcome this limitation use the virtio-scsi as drive controller.
- Download
qcow2system disk to your KVM hypervisor. -
Resize the
qcow2data-disk that corresponds to your network needs if necessary. Use the following command:qemu-img resize ipfabric-disk1.qcow2 100G # (up to 1000G for 20 000 devices) -
Deploy the VM to your hypervisor with the virt-install utility by issuing the following command (chose CPU and RAM size according to the size of your network):
virt-install --name=IP_Fabric --disk path=<path to the disk>.qcow2 --graphics spice --vcpu=4 --ram=16384 --network bridge=virbr0 --import -
This command deploys a new virtual machine with IP_Fabric name, system
qcow2disk, 4 CPU cores, 16GB of RAM and will connect VM to the internet through thevirtbr0interface (if your machine has a different bridge interface name or you want to connect it straight through the device network card to the internet you need to change the--networkparameter). -
This command also starts up the VM.
-
Additionally, you can create and add a new empty virtual disk if needed.
Deploying a Virtual Machine on VirtualBox
Warning
Deploying IP Fabric on VirtualBox is currently not officially supported – it is not tested and we cannot guarantee that it will work.
-
Download the
OVAimage. -
Import the
OVAimage via File → Import Appliance…:
-
In the next step of the Import Virtual Appliance guide:
- set CPU and RAM as per the hardware requirements for your use-case
- set the Network Adapter to
Paravirtualized Network (virtio-net) -
keep the
Import hard drives as VDIoption checked for importing the disk image in the default VirtualBox format, otherwise the disk image will be imported as VDMK (the default format of VMware)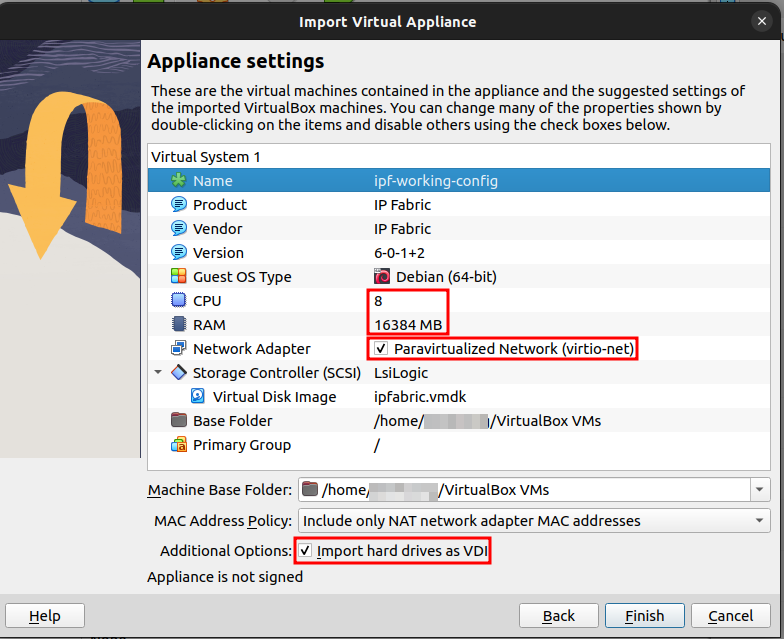
-
Right-click on the newly-created virtual machine and select its Settings…
-
In the System section, select
ICH9as the Chipset: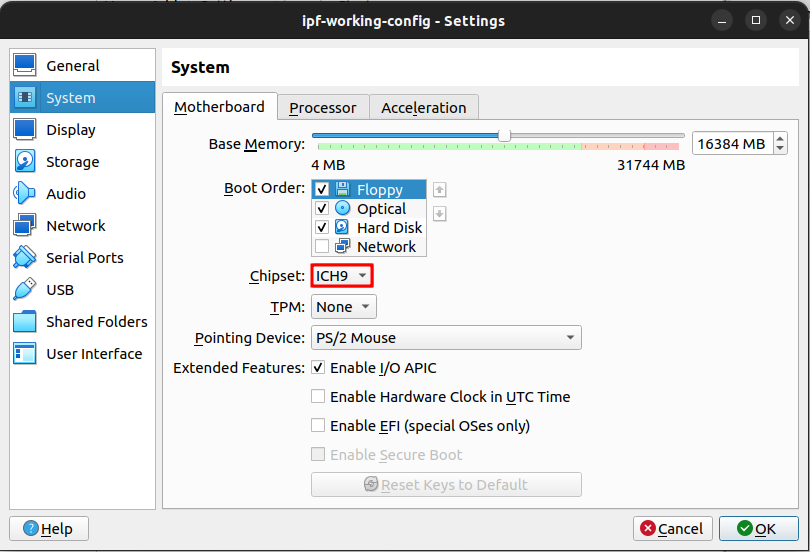
-
In the Display section, select
VMSVGAas the Graphics Controller: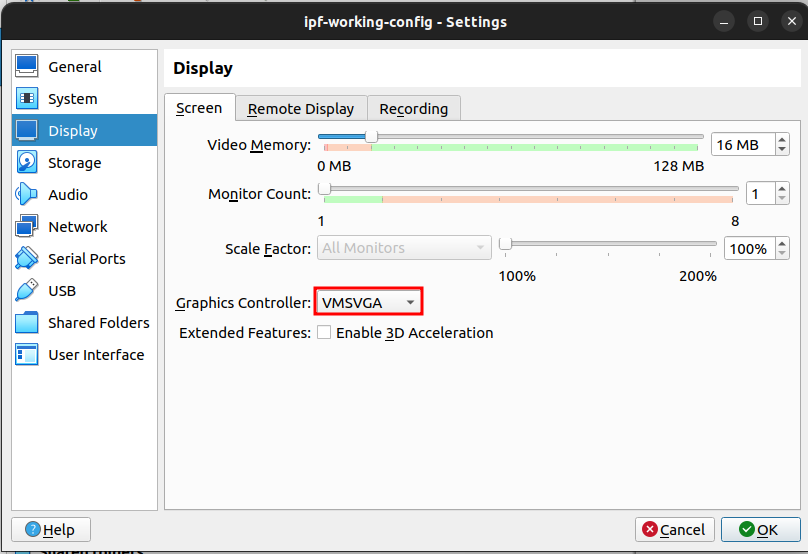
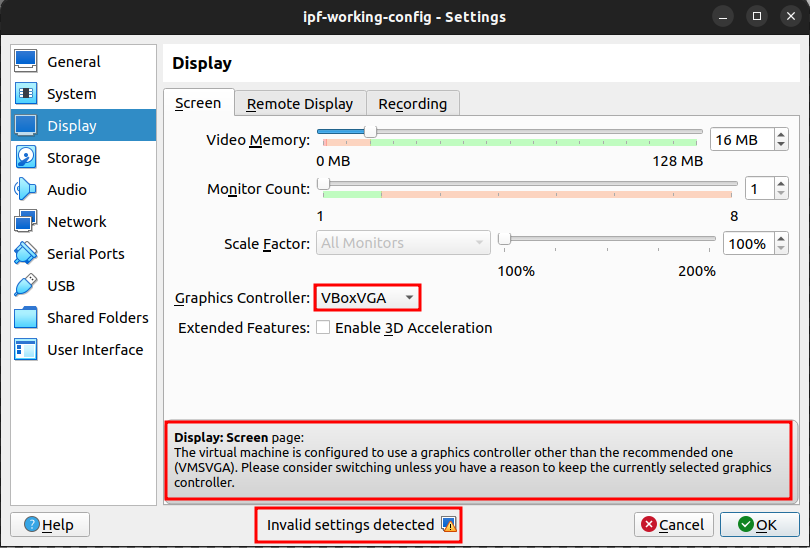
-
or to what VirtualBox suggests when an invalid Graphics Controller is selected:
-
Warning
When an invalid Graphics Controller is selected, it can lead to issues in the virtual machine and even on the host machine.
-
-
In the Storage section, select
virtio-scsias the Controller Type: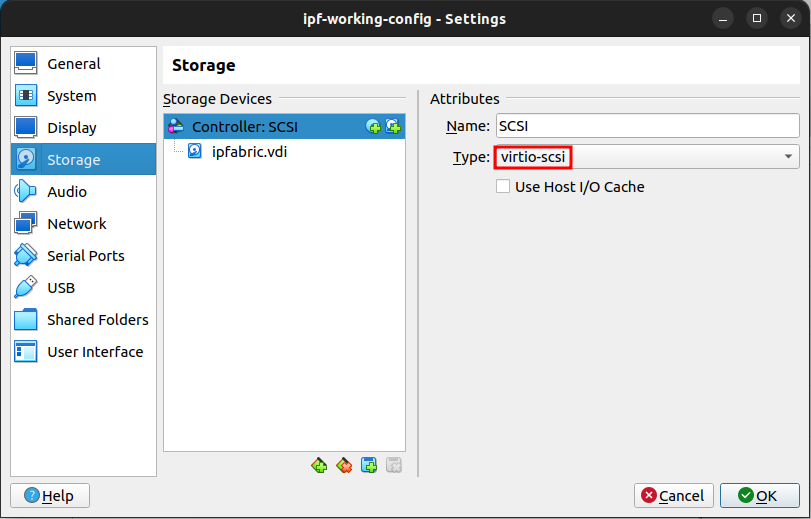
-
In the Network section, select
Bridged Adapterand re-check in Advanced that the Adapter Type isParavirtualized Network (virtio-net):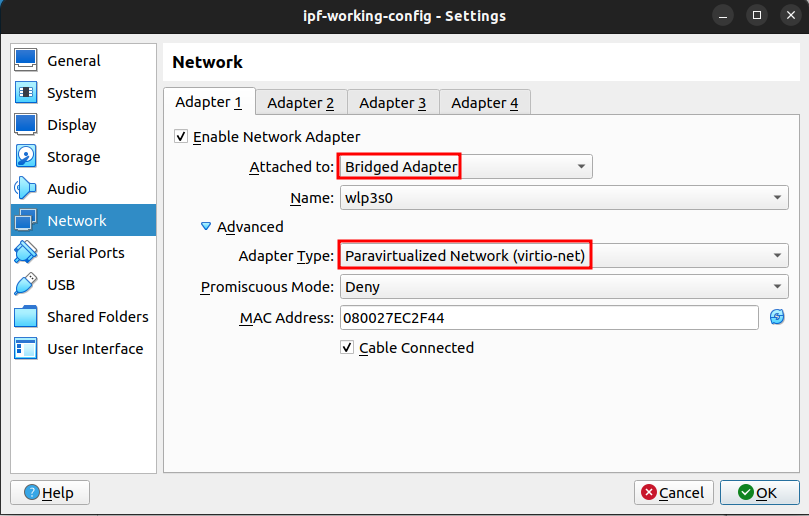
-
Start the virtual machine.