Create and Assign Labels
Experimental Feature
Labels are an experimental feature introduced in 8.1, disabled by
default. To enable labels, set the ENABLE_LABELS feature flag. See
Labels for details.
Create a Label in the Catalog
- Navigate to Settings → Discovery & Snapshots → Discovery Data Enrichment → Labels and click + Add new.
- Enter a label name – for example,
region. - (Optional) Add the values you expect to use with it – for example,
ukandus. A label without values, such astag, works as a simple tag.
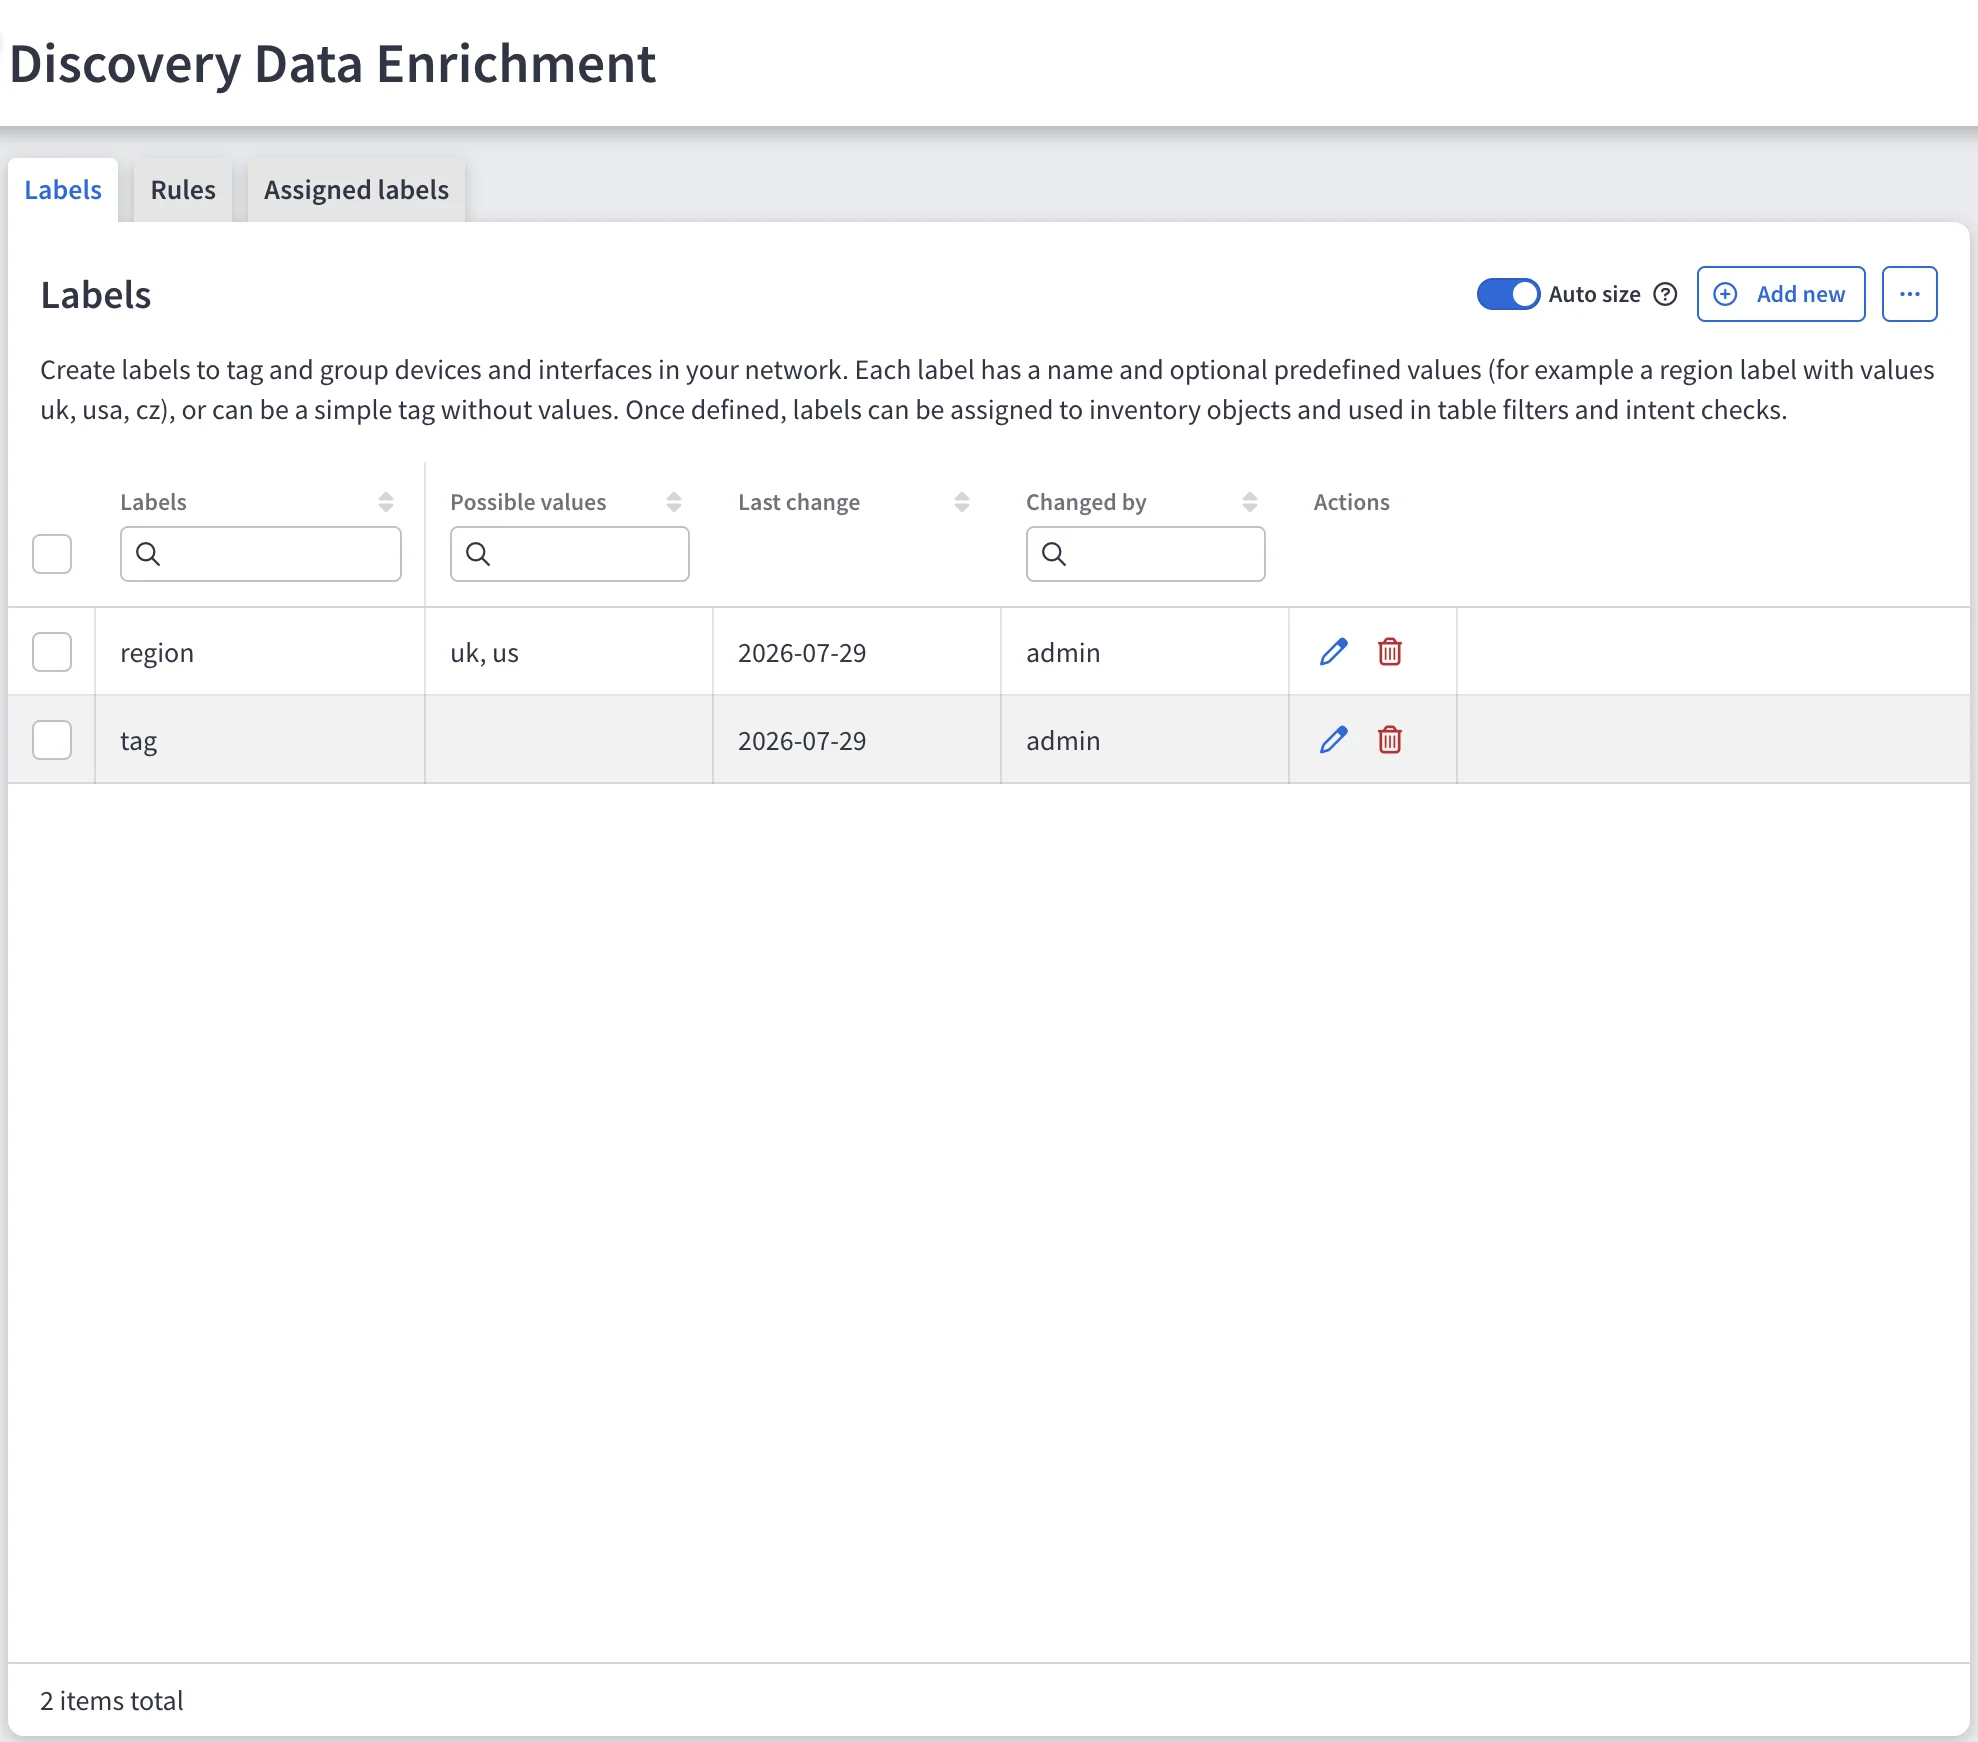
The catalog defines what the label picker offers. Creating a catalog entry does not assign the label to anything.
Assign a Label
- Open the Assigned labels tab and click + Add new.
- In Target, search for the devices and interfaces to assign the label to. The search matches on hostname, serial number, and interface name, and searches across all loaded snapshots. Results show the target type, its most recent hostname, and the number of snapshots it appears in.
- Select one or more targets. A single assignment can mix devices and interfaces.
- Click + Add label and pick the label and, if the label uses values, a value.
- To push a device label down to that device’s L2 interfaces, enable Assign also to children. The interfaces receive the label with the source Inherited. Removing the label from the device also removes it from its interfaces.
- Keep Apply to future snapshots enabled to keep the assignment in future snapshots. When disabled, the assignment applies only to the current snapshot and disappears at the next label calculation. The switch is enabled by default when you work in the latest snapshot.
- Click Assign labels.
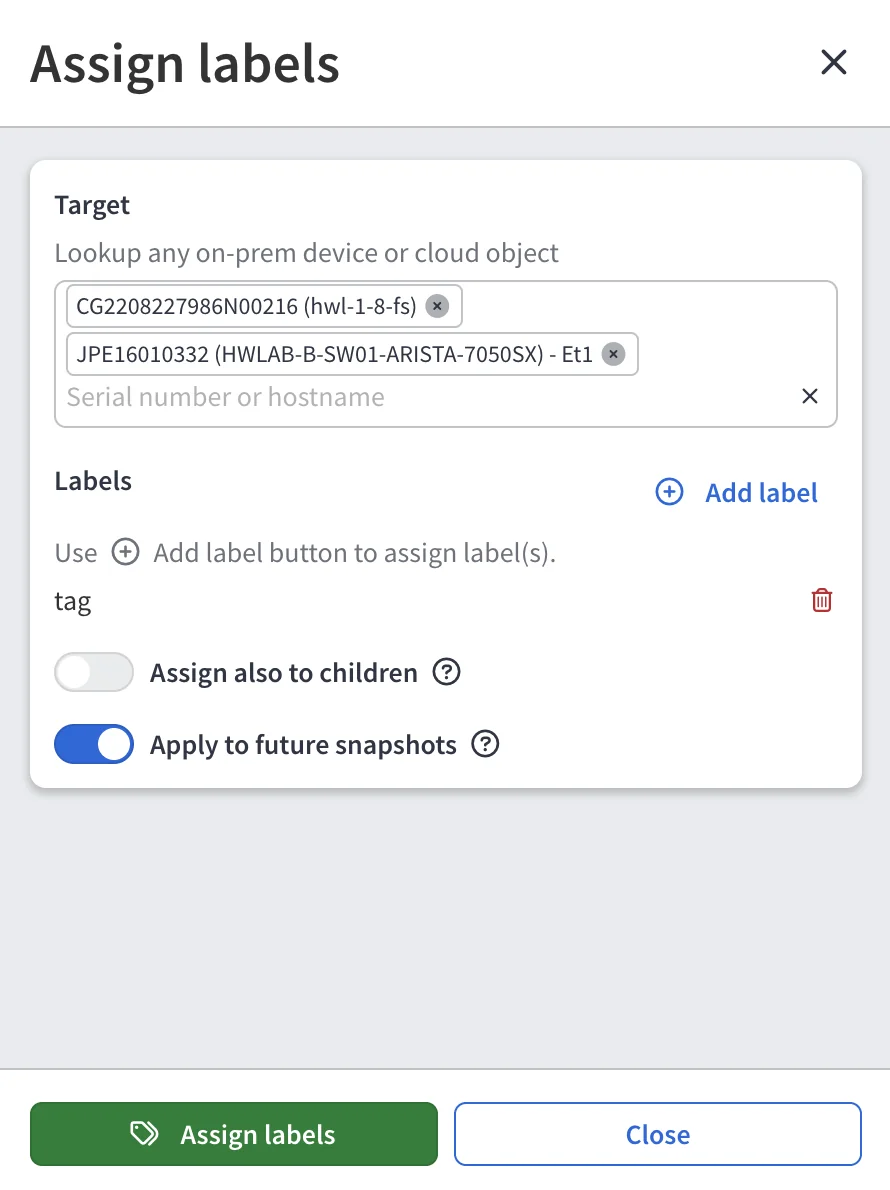
The label appears on the selected targets in the current snapshot. With Apply to future snapshots enabled, it also applies to every future snapshot.
Change or Remove an Assignment
In the Assigned labels tab, each row shows the target type, hostname, target, label, and the source of the assignment in the Assignment column.
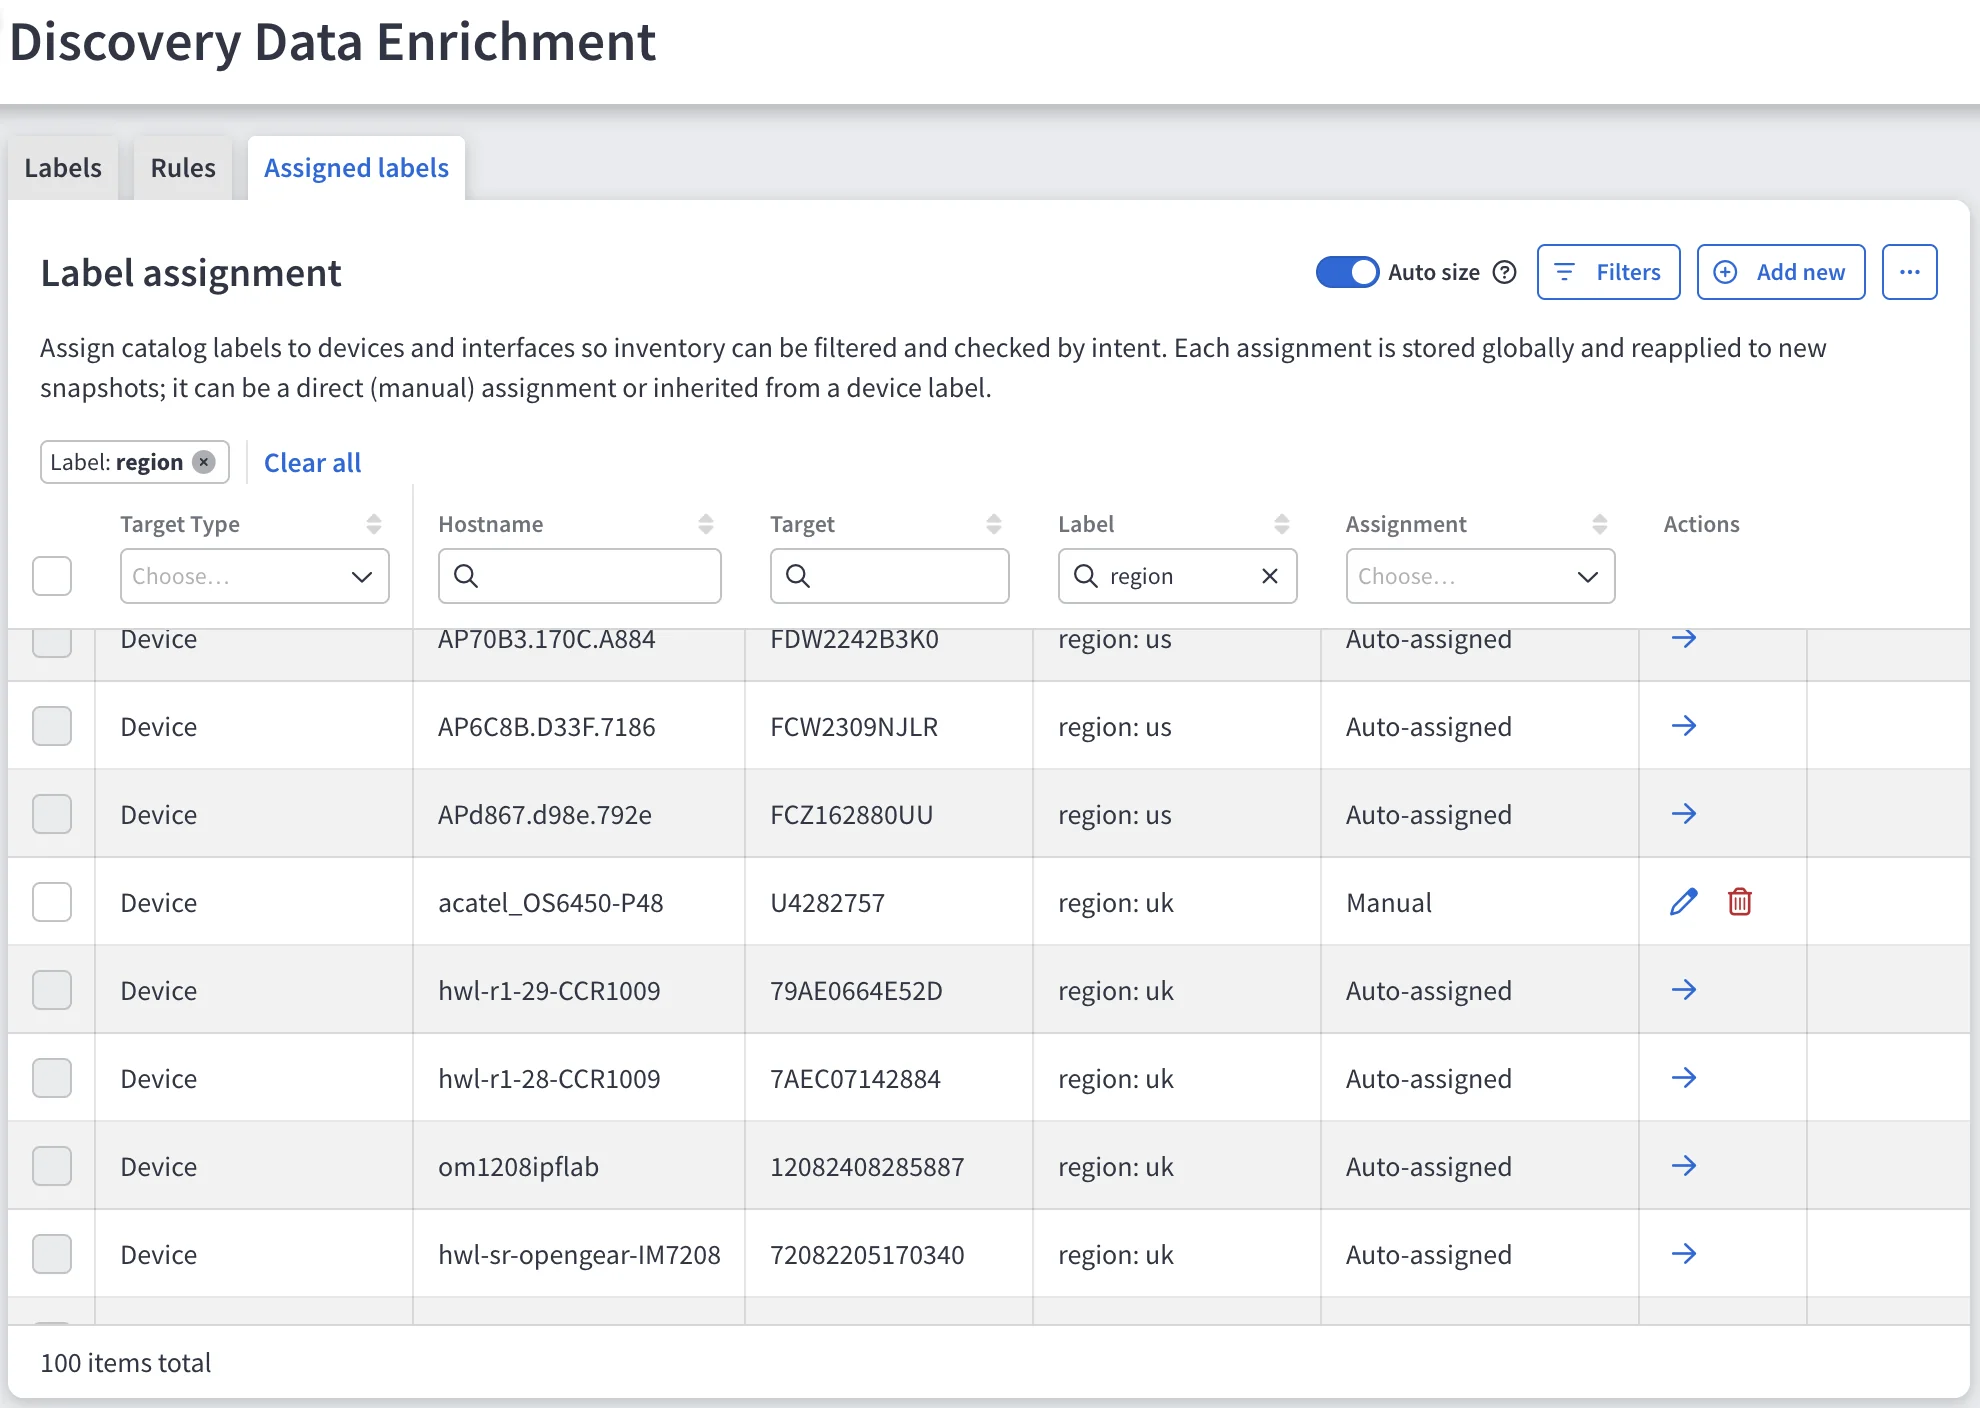
- Rows with the source Manual: use the icons in the Actions column to update or remove them.
- Rows with the source Auto-assigned or Inherited are read-only. The arrow in the Actions column leads to the rule or the parent assignment that produced them – update the rule, or remove the label from the parent device.
When you update or remove a manual assignment, enable Apply to future snapshots to apply the change to future snapshots. Otherwise, the change applies only to the current snapshot.
Edit Labels in Device Explorer
You can also view and edit labels directly from technology tables, without opening the settings page. In any table with a Labels column (for example, Inventory → Devices), click the labels of a row. Device Explorer opens with a Labels tab listing every label on the object, with its Name, Value, Source, and Assignment source.
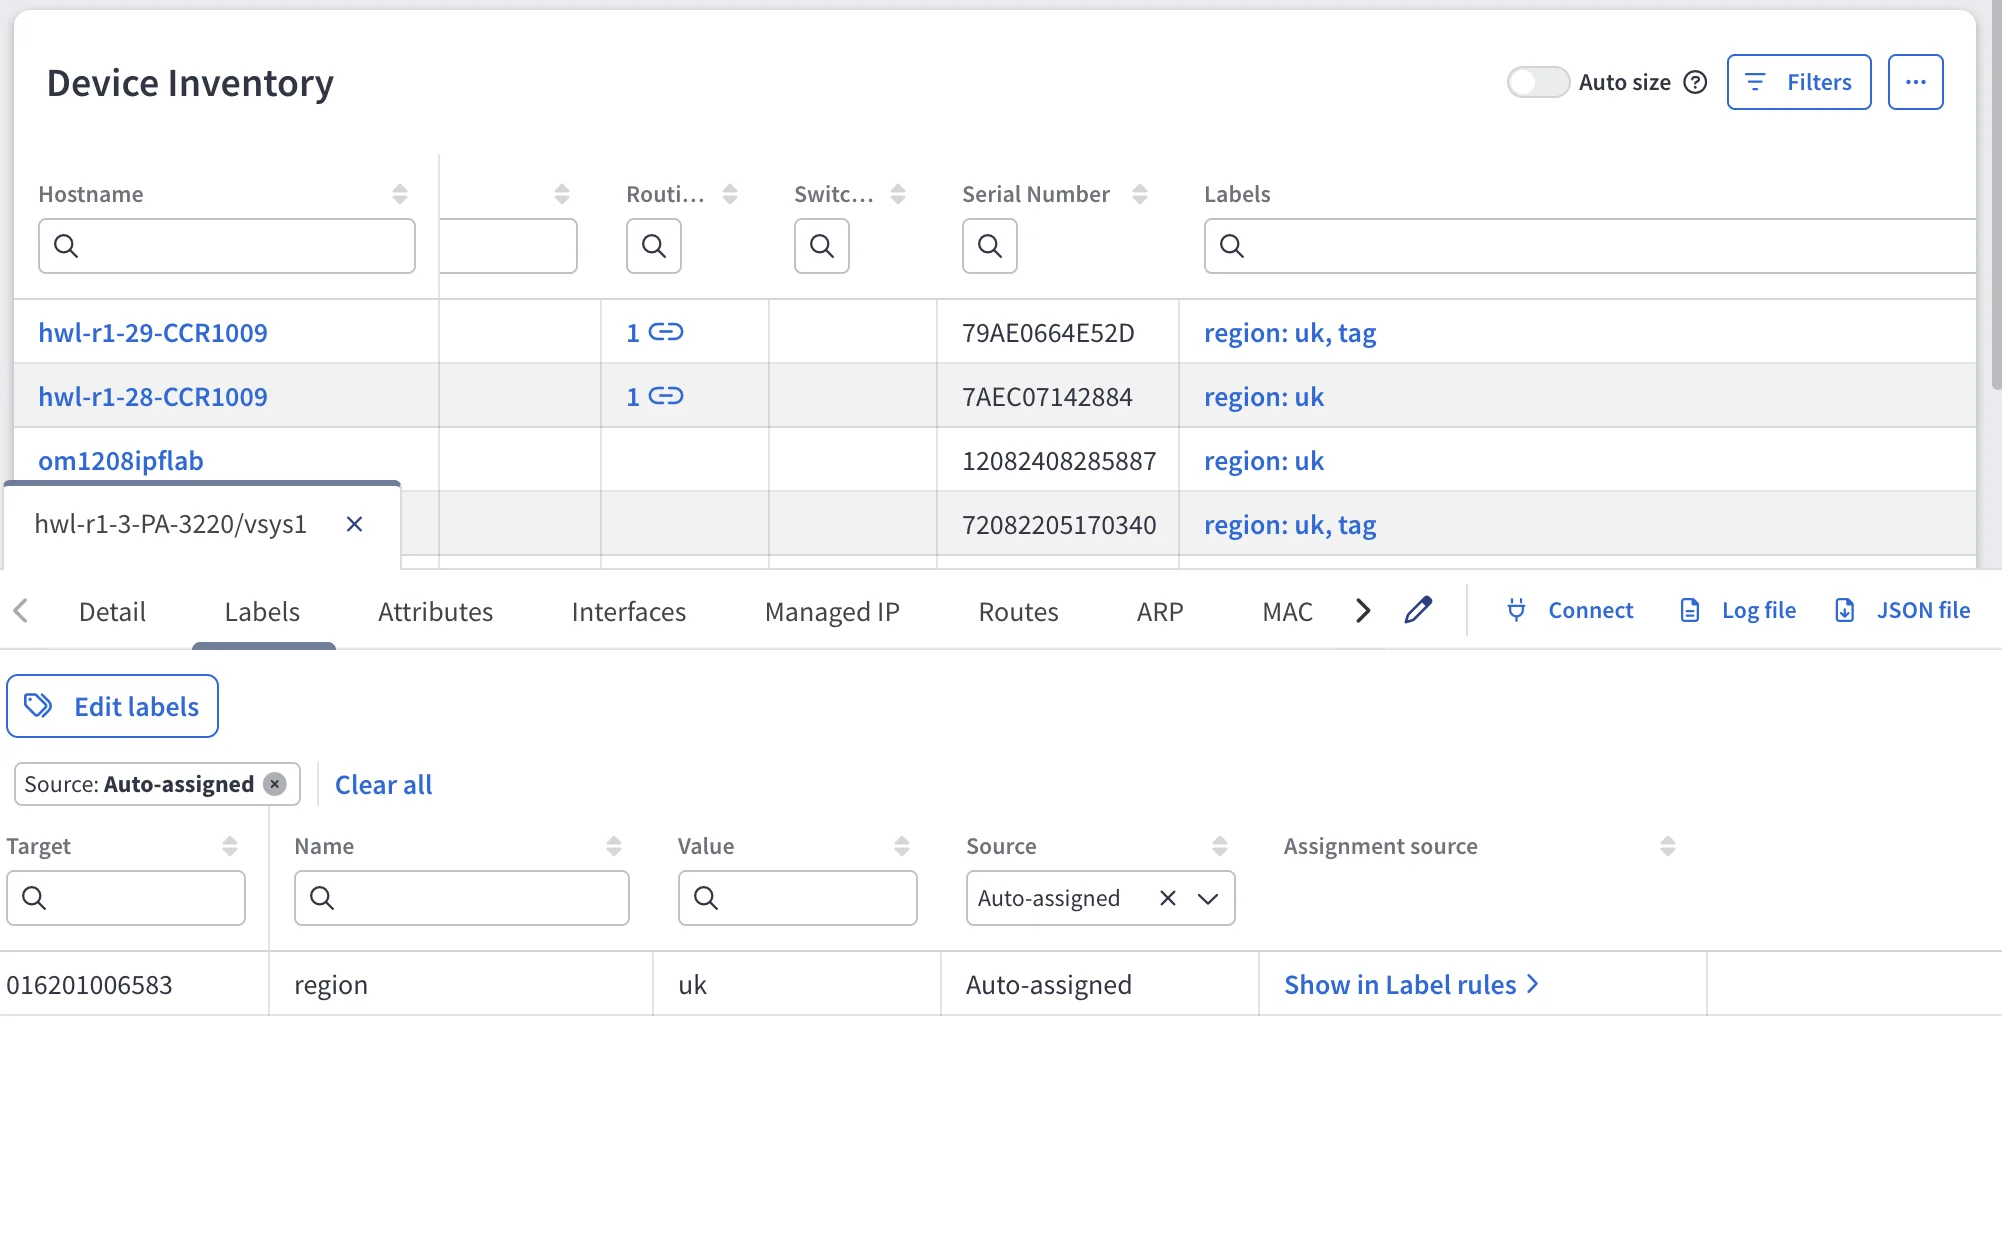
- For Auto-assigned labels, Show in Label rules opens the rule that produced the label.
- To change the manual labels of the object, click Edit labels. Add labels with + Add label or remove them with the trash icon, set Apply to future snapshots, and click Save manual labels.
You cannot update Auto-assigned or Inherited labels from Device Explorer. Update the rule or the parent device’s labels instead.
Older Snapshots
When you edit labels in a snapshot other than the latest one, Apply to future snapshots is disabled by default. If you enable it, the change applies to future snapshots, but it may not match what you see on screen – the labels of these targets may have changed since the snapshot was taken. For changes that should persist, use the latest snapshot.